4 Week3: Awk and how to download files
![]()
For this week, we’ll continue to use the data that you downloaded last week. If you need to download it again please use the wget link below to download the tar file.
cd /home/margeno/
wget https://raw.githubusercontent.com/BayLab/MarineGenomicsData/main/week2.tar.gz
use tar to uncompress and unzip the file
tar -xzvf week2.tar.gzThis will create a week2 directory in your MarineGenomics directory (it will also create the MarineGenomics directory if you don’t already have one).
4.1 AWK
Awk is a fast and versatile pattern matching programming language. Awk can do the same tasks that sed, grep, cat, and wc; and then it can do a lot more https://www.gnu.org/software/gawk/manual/gawk.html. This program deserves a full class to go into details, so instead we just have this section to make you aware that the program exists.
Let’s see how awk can behave like wc.
$ cd /home/margeno/MarineGenomics/week2/$ ls
TableS2_QTL_Bay_2017.txt sra_metadata untrimmed_fastqThis table is from the Bay et al. 2017 publication ~/MarineGenomics/week2/TableS2_QTL_Bay_2017.txt and we will use it as our example file for this section.
We can look inside the file by using cat or awk
$ awk '{print $0}' TableS2_QTL_Bay_2017.txtThe instructions are enclosed in single quotes
This command has the same output of “cat”: it prints each line from the example file TableS2_QTL_Bay_2017.txt
The structure of the instruction is the following: - curly braces surround the set of instructions - print is the instruction that sends its arguments to the terminal - $0 is a variable, it means “the content of the current line”
As you can see, the file contains a table.
Trait   n   LOD Chr Position (cM)   Nearest SNP
mate choice 200 4.5 14  22.43   chrXIV:1713227
mate choice     200 4.61    21  8   chrXXI:9373717
discriminant function   200 4.83    12  17  chrXII:7504339
discriminant function   200 4.23    14  8.1 chrXIV:4632223
PC2 200 4.04    4   30.76   chrIV:11367975
PC2 200 6.67    7   47  chrVII:26448674
centroid size   200 6.97    9   47.8    chrIX:19745222
x2* 200 3.93    7   60  chrUn:29400087
y2* 200 9.99    4   32  chrIV:11367975
x3  200 4.45    1   32.3    chrI:15145305
x4  200 5.13    16  30.9    chrXVI:12111717
x5* 200 4.54    15  6   chrXV:505537
y5  200 4.21    4   24.9    chrIV:15721538
x6  200 3.96    16  29.5    chrXVI:13588796
y6* 200 4.14    9   30.2    chrIX:18942598
y15*    200 5.3 2   27  chrII:19324477
x16 200 5.49    7   60  chrUn:29400087
x17     200 4.92    1   32.8    chrI:14261764
Table S2. Significant QTL loci for mate choice and morphology
Now let’s use awk to count the lines of a file, similarly to what wc -l would do.
As you probably remember, -l is an option that asks for the number of lines only.
However, wc counts the number of newlines in the file, if the last line does not contain a carriage return (i.e. there is no emptyline at the end of the file), the result is going be the actual number of lines minus one.
$ wc -l TableS2_QTL_Bay_2017.txt19 TableS2_QTL_Bay_2017.txtA workaround is to use awk. Awk is command line program that takes as input a set
of instructions and one or more files. The instructions are executed on each line
of the input file(s).
$ awk '{print NR;}' TableS2_QTL_Bay_2017.txt | tail -1Awk can also search within a file like grep can. Let’s see if there are any significant QTL loci in the chromosome “chrXIV”
$ awk '/chrXIV/' TableS2_QTL_Bay_2017.txtThis chromosome had two significant QTL Loci for mate choice and morphology.
When to use awk?
- for search and replacement of large files (it’s fast!)
- when manipulating multiple large files
4.2 Moving and Downloading Data
Below we’ll show you some commands to download data onto your instance, or to move data between your computer and the cloud.
4.3 Getting data from the cloud
There are two programs that will download data from a remote server to your local
(or remote) machine: wget and curl. They were designed to do slightly different
tasks by default, so you’ll need to give the programs somewhat different options to get
the same behaviour, but they are mostly interchangeable.
wgetis short for “world wide web get”, and it’s basic function is to download web pages or data at a web address.cURLis a pun, it is supposed to be read as “see URL”, so its basic function is to display webpages or data at a web address.
Which one you need to use mostly depends on your operating system, as most computers will only have one or the other installed by default.
Today we will use wget to download some data from Ensembl.
Exercise
Before we can start our download, we need to know whether we’re using curl or wget.
To see which program you have, type:
$ which curl
$ which wget
which is a BASH program that looks through everything you have
installed, and tells you what folder it is installed to. If it can’t
find the program you asked for, it returns nothing, i.e. gives you no
results.
On Mac OSX, you’ll likely get the following output:
$ which wget$ /usr/bin/wgetOnce you know whether you have curl or wget, use one of the
following commands to download the file:
$ cd
$ wget ftp://ftp.ensemblgenomes.org/pub/release-37/bacteria/species_EnsemblBacteria.txt
Let’s see if the file from ensembl downloaded
ls species_EnsemblBacteria.txtit did!
4.4 Downloading files from Github
Github is a useful place to store data files and scripts and it is widely used by researchers in many different fields, including genomics. There are a few useful tricks to understanding how to best transfer files from github to your own terminal.
There are two main ways to transfer files from github:
+ Use git clone to download an entire repository (Directory)
+ use wget to download a single file
If you’re interested in getting a repository and all of its contents you can use git clone. This can be useful if you’re interested in using data files and the scripts that come with them.
First navigate to your home directory with cd (leaving it blank takes you to your home automatically).
And then use git clone to download the repository reallycoolrepo
cd

git clone https://github.com/SerenaCaplins/reallycoolrepo.git
This should make a new directory called reallycoolrepo. Let’s ls in this directory to see what’s in it.
ls reallycoolrepo/

files forloop.sh MarineGenomics.txt README.md
We have three files and one directory here. You can view the MarineGenomics.txt file with cat
cat reallycoolrepo/MarineGenomics.txt

  __  __                  _                     _____                                      _
 |  \/  |                (_)                   / ____|                                    (_)
 | \  / |   __ _   _ __   _   _ __     ___    | |  __    ___   _ __     ___    _ __ ___    _    ___   ___
 | |\/| |  / _` | | '__| | | | '_ \   / _ \   | | |_ |  / _ \ | '_ \   / _ \  | '_ ` _ \  | |  / __| / __|
 | |  | | | (_| | | |    | | | | | | |  __/   | |__| | |  __/ | | | | | (_) | | | | | | | | | | (__  \__ \
 |_|  |_|  \__,_| |_|    |_| |_| |_|  \___|    \_____|  \___| |_| |_|  \___/  |_| |_| |_| |_|  \___| |___/
Pretty cool huh?
Using git clone to get an entire repository can be useful, but often we’re just interested in getting a single file. We’ve already learned how to get files using wget, but this isn’t as straightforward on git hub. To illustrate when it doesn’t work let’s navigate to a repository where there’s a file that we’re interested in:
copy and paste this link into your browser:
https://github.com/BayLab/MarineGenomicsDataThis is the repository where we have been storing all of the data for the class. We typically download a single tar file each week instead of cloning the whole repository all at once (this allows us to make changes to each week without having to download the whole repo every week, which would also override your files).
Say you wanted to get the week10.tar.gz file
If you click on the file you can copy the file path from your browser. A few ways to do this but perhaps easiest is to click the file and copy the path that shows up in your browser.
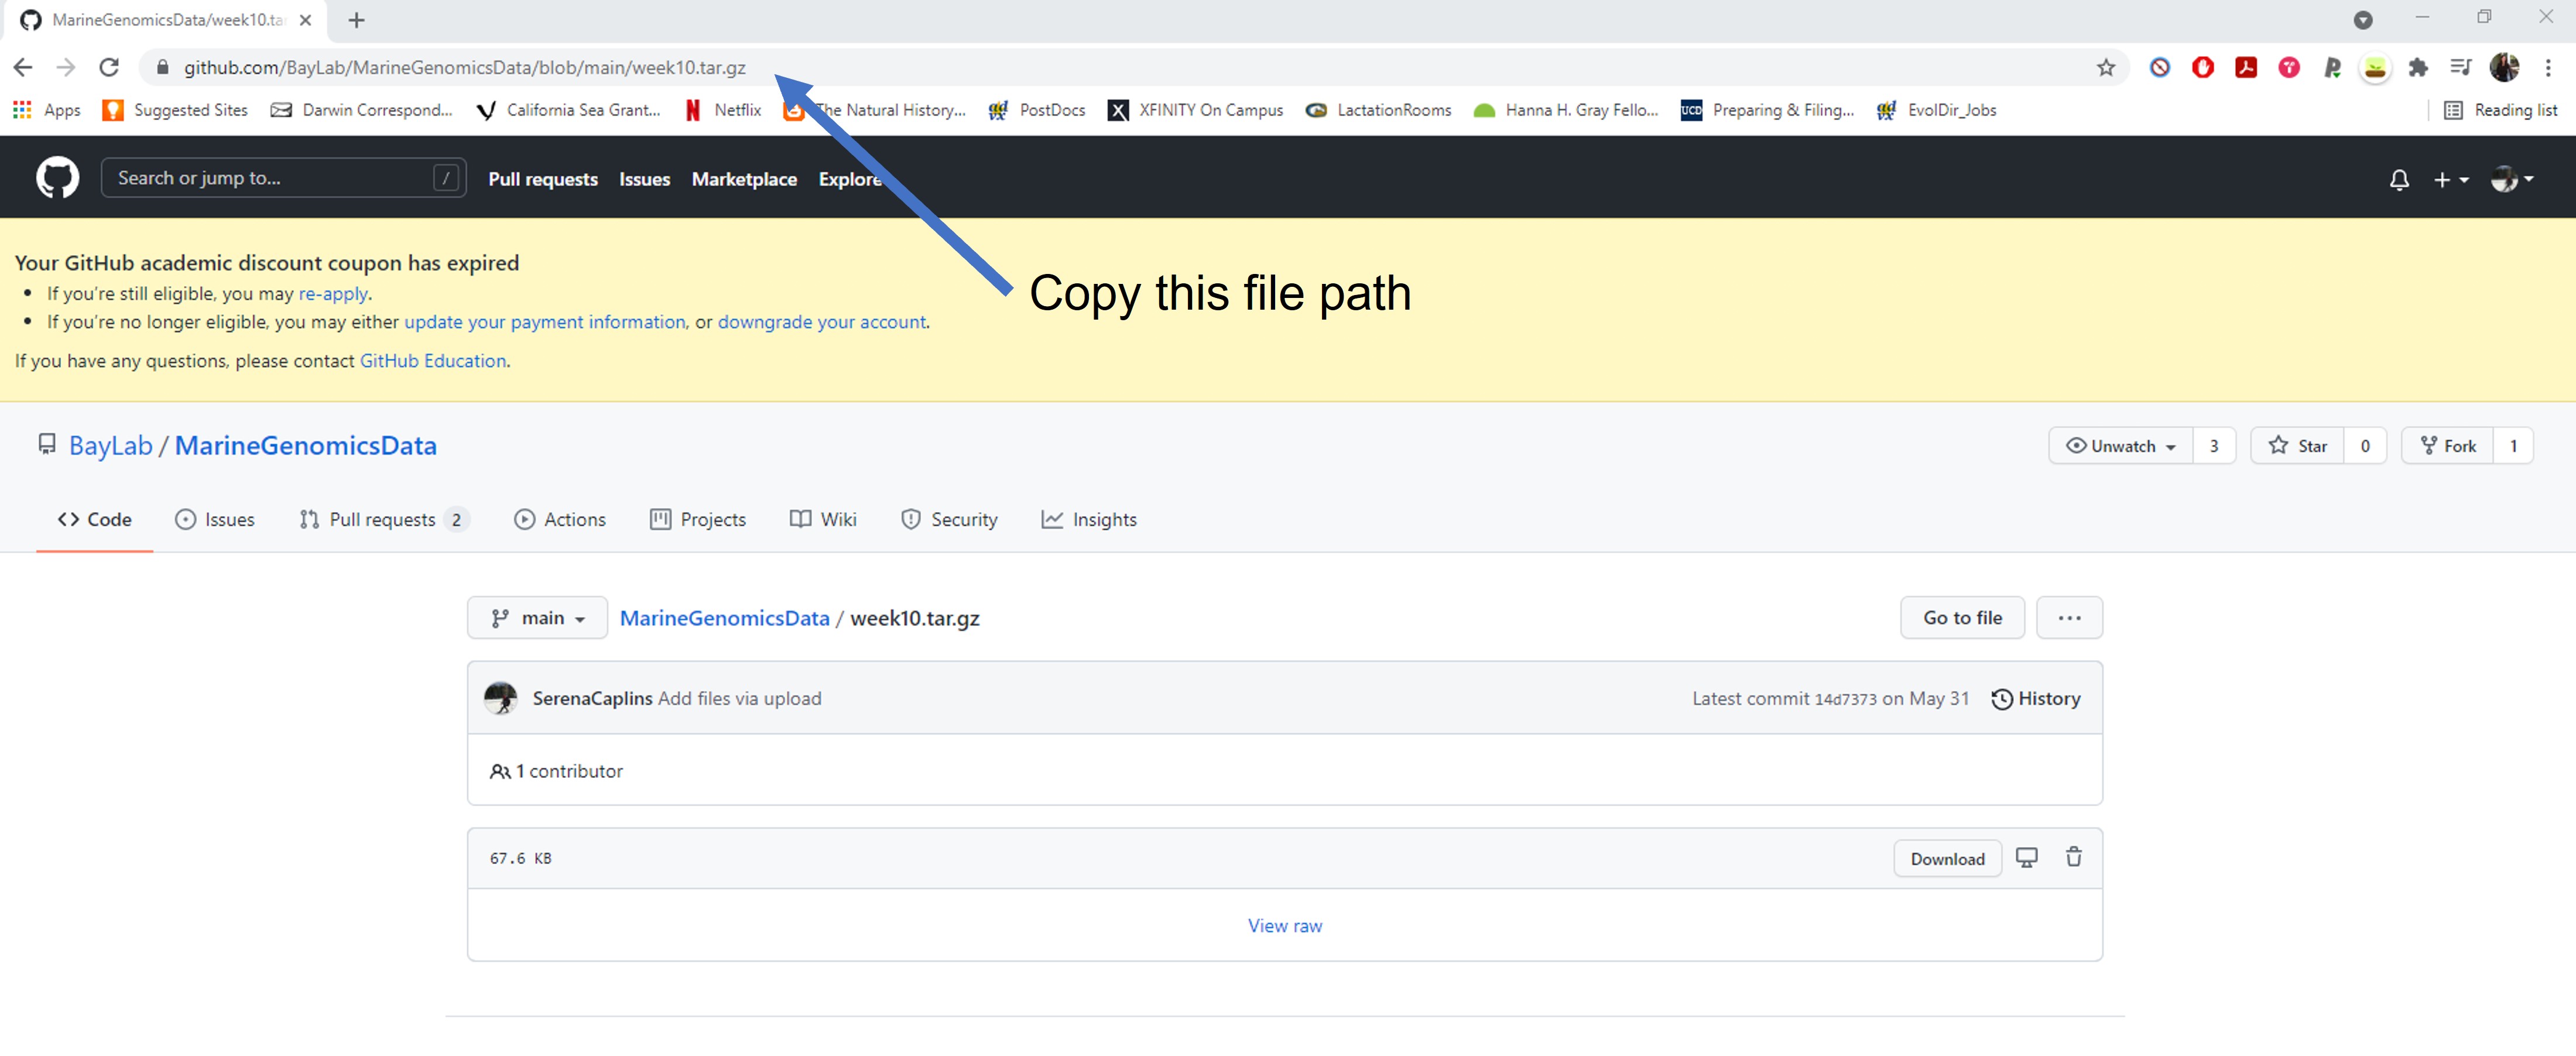
Week3_gitpath.jpg
https://github.com/BayLab/MarineGenomicsData/blob/main/week10.tar.gzSeems fine right? Let’s use wget to try and import this into our home directory.
wget https://github.com/BayLab/MarineGenomicsData/blob/main/week10.tar.gzNow let’s try and untar it
tar -xvzf week10.tar.gzThis prints an error message:
gzip: stdin: not in gzip format
tar: Child returned status 1
tar: Error is not recoverable: exiting now
What seems to have gone wrong. We get a clue if we use less to view the file (you normally wouldn’t use less to view to a tar.gz file, but in this case it will tell us something useful). Useful tip: less does work on .gz files!
less week10.tar.gzYou will see something like this:
<!DOCTYPE html>
<html lang="en" data-color-mode="auto" data-light-theme="light" data-dark-theme="dark">
  <head>
    <meta charset="utf-8">
  <link rel="dns-prefetch" href="https://github.githubassets.com">
  <link rel="dns-prefetch" href="https://avatars.githubusercontent.com">
  <link rel="dns-prefetch" href="https://github-cloud.s3.amazonaws.com">
  <link rel="dns-prefetch" href="https://user-images.githubusercontent.com/">
  <link rel="preconnect" href="https://github.githubassets.com" crossorigin>
  <link rel="preconnect" href="https://avatars.githubusercontent.com">


  <link crossorigin="anonymous" media="all" integrity="sha512-Xvl7qd6ZFq6aBrViMpY+7UKRL79QzxxYG1kyELGe/sH4sV3eCks8DDXxa3WolACcKPac42eqrfe6m0jazyAIPQ==" rel="stylesheet" href="https://github.githubassets.com/assets/frameworks-5ef97ba9de9916ae9a06b56232963eed.css" />
  <link crossorigin="anonymous" media="all" integrity="sha512-24GJDHWJro3USSMV5JFy5QbE8eCNYG61UucNp7vJMTaeJMrBy6FLiLFgX9jXnWlddv2VRu/rTLIkxzuRDF9ZVA==" rel="stylesheet" href="https://github.githubassets.com/assets/colors-v2-db81890c7589ae8dd4492315e49172e5.css" />
    <link crossorigin="anonymous" media="all" integrity="sha512-rcBopHrwspQORpXVLihZMP22sFwuIo3fL1DyFo5aXwWnV5FzV/nlAGnX/36fI9GQVc2VN7MiIT34RMCwq8jemg==" rel="stylesheet" href="https://github.githubassets.com/assets/behaviors-adc068a47af0b2940e4695d52e285930.css" />
This is not what should be in the file. We’re seeing html coding like what you would see for a website. The reason for this is because the link we got from github was to the html page showing the file, not the location of the actual file itself.
Let’s remove this week10.tar.gz file
rm week10.tar.gzSo all of the repositories are encoded as html files to make the github website, we need to get the actual file path of the file itself to use wget.
You can do this by copying the raw file path, which you will find by clicking view raw or by using control-c or right clicking and selecting copy link address (for pc users) the download tab.
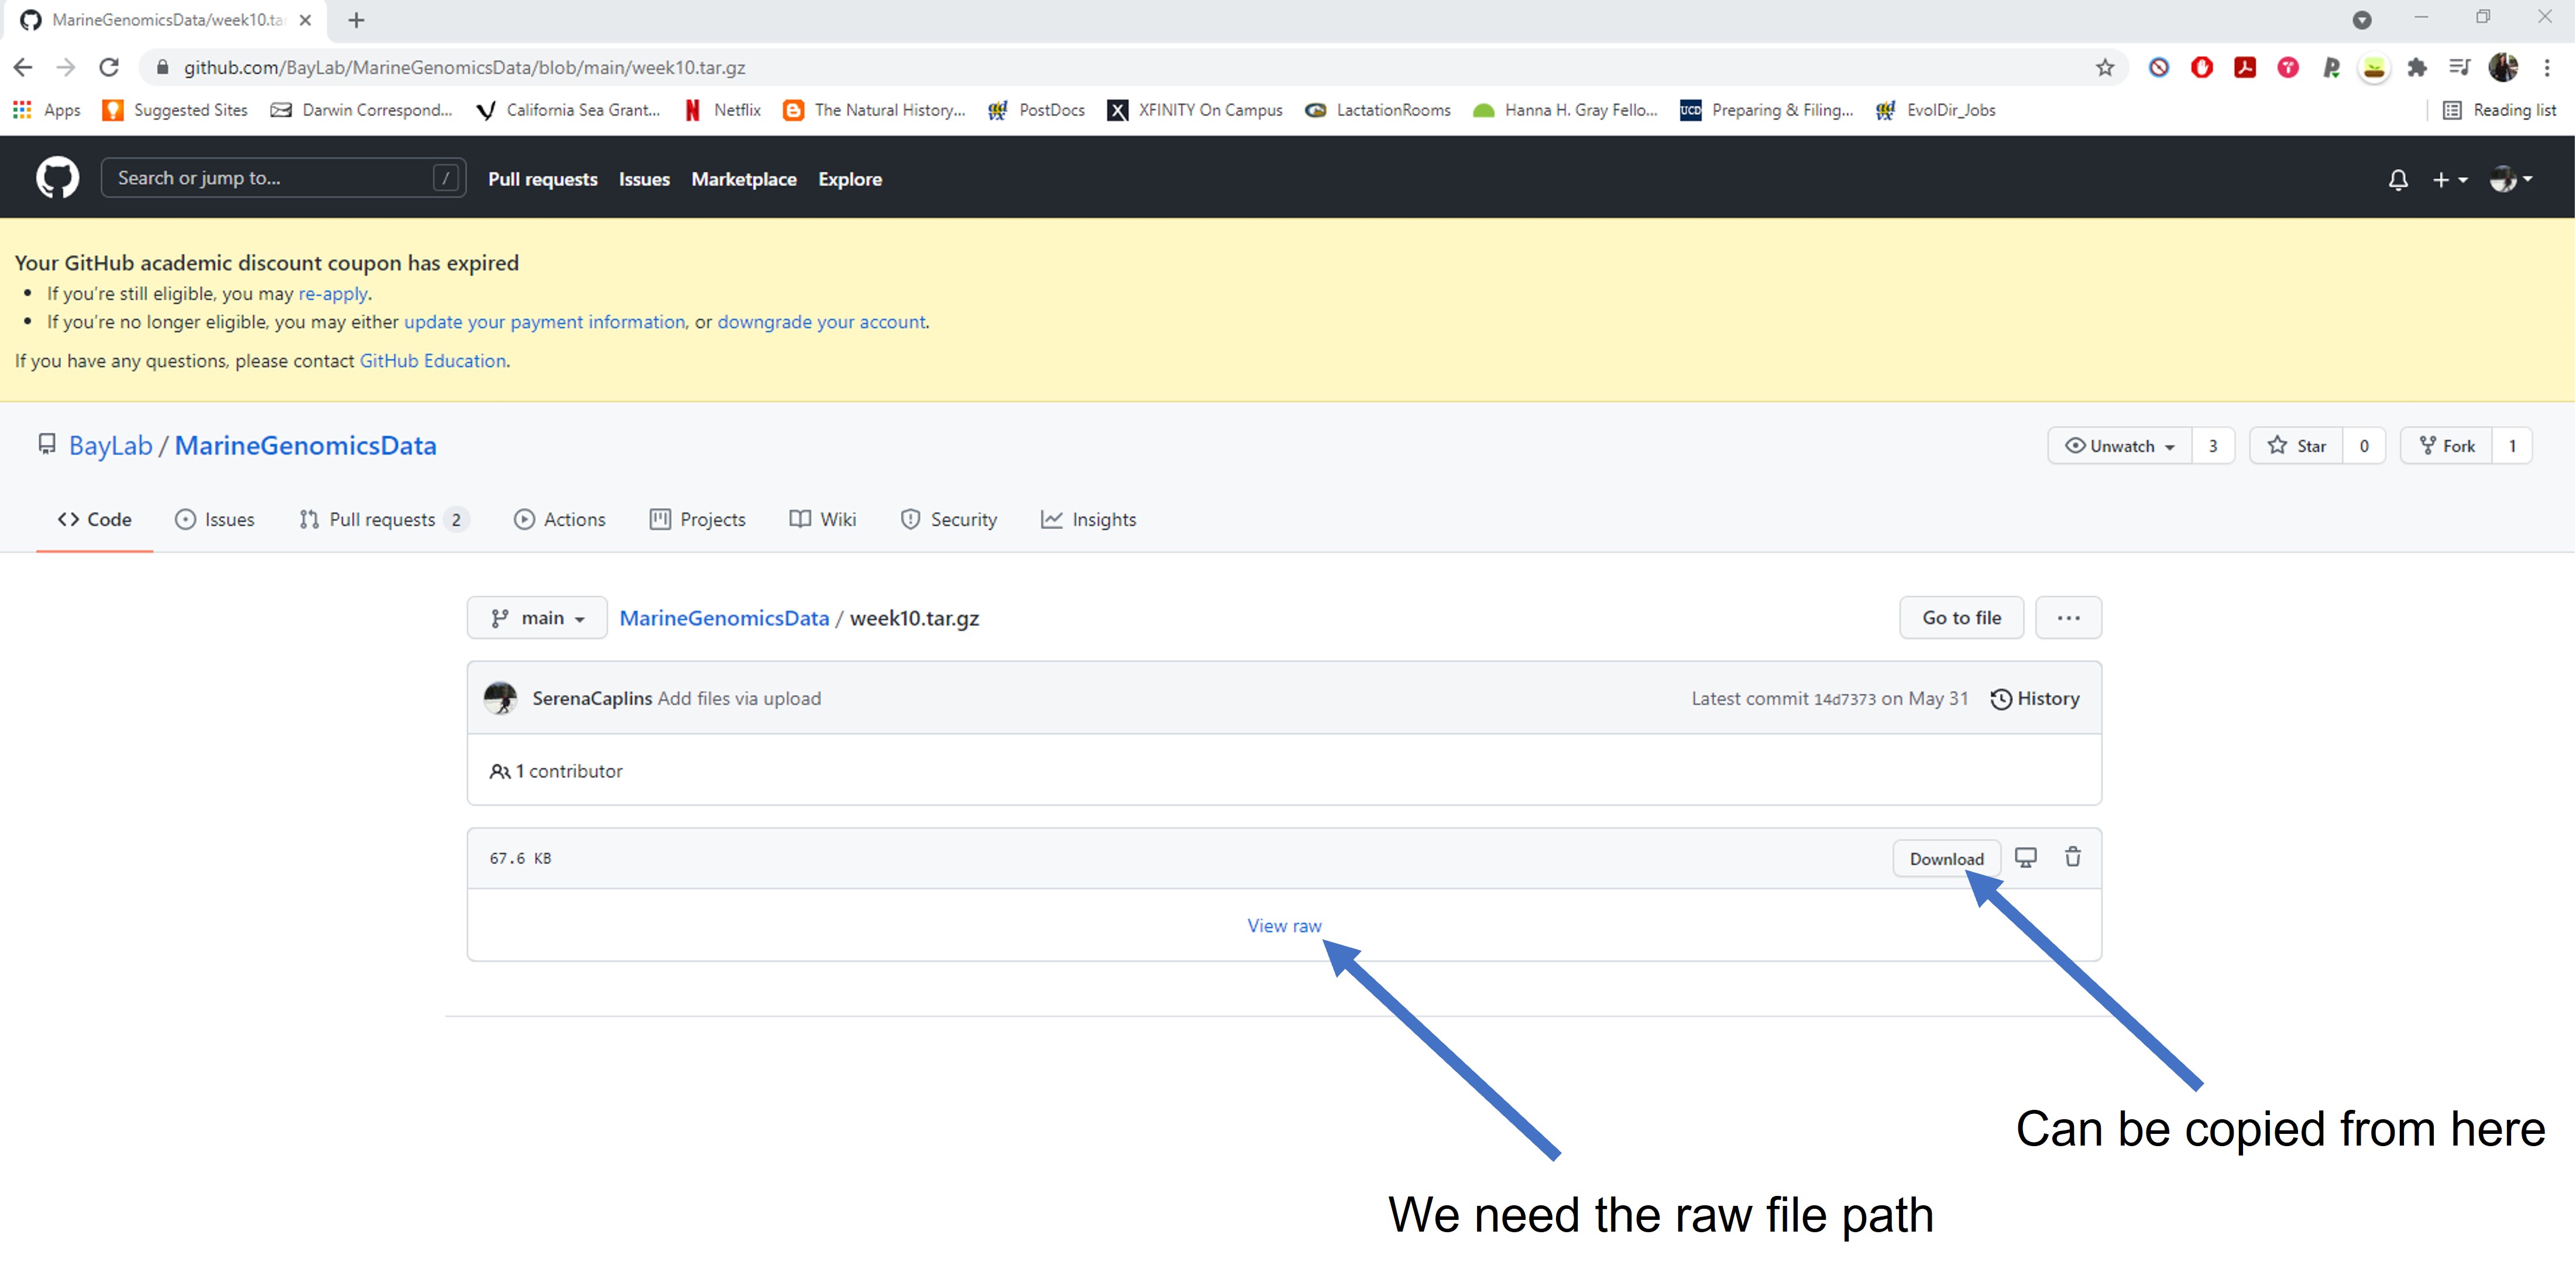
Week3_rawgitpath.jpg
Let’s try this again with our new link. It should say the word raw somewhere in the file path
wget https://github.com/BayLab/MarineGenomicsData/raw/main/week10.tar.gzNow untar it
tar -xzvf week10.tar.gzYou should see something like this, which tells us that it worked!!
MarineGenomicsData/Week10/
MarineGenomicsData/Week10/candidate_fastas.fa
You can remove this as we won’t be using it later in the course
rm -r MarineGenomicsDataSo we need to find that raw file path to use wget on any single file that we want in git hub.
4.5 Final bash wrap-up
We’ve covered a lot of ground so far in the last 2 and a half weeks! It’s a good time to review the commands we’ve learned and the skills we’re starting to develop.
In week 1, we showed you:
- how to access jetstream a cloud computing resourse
- how to navigate the terminal with bash/UNIX commands such as
ls, cd,mv,mkdir, andcp` - the differnce between full and relative file paths: ++ full path example: /home/margeno/MarineGenomics/week2/README.txt ++ relative path from the MarineGenomics directroy: week2/README.txt
- how to use
Tabto autofill commands and file paths - the
mancommand to see full parameters for bash commands
In week 2, we covered:
- how to view files using
less,cat,head,tail - how to view and modify file and directory permissions using
chmod - how to use wildcards like
*to view directory contents - to oh so cautiously use
rmto permanently delete a file - use
grepto search a file and>>to append search results to a new file - how to write a script using a text editor
nanoin our case - executing a script from a saved file with
bashor by making it an executable program withchmod - writing for loops
Finally in week3, we learned
- how to use Awk to edit the contents of a file
- how to move and download data
At this point if you haven’t already it’s a good time to make a cheat sheet of the commands we’ve learned to keep by your computer so you can reference them at anytime.
There are several very good bash/Unix cheat sheets available online. Here are links to a few of them:
https://cheatography.com/gregcheater/cheat-sheets/bash/
https://cheatography.com/davechild/cheat-sheets/linux-command-line/